
Imagine having the delightful aroma of fresh dill right at your fingertips, ready to enhance your culinary creations any time you wish. Growing dill from seed indoors is not only a rewarding experience but also a simple and effective way to ensure you always have this versatile herb on hand.
You might think it’s a challenge, but with a few easy steps, you can cultivate your own lush dill plants indoors. Whether you’re a seasoned gardener or a curious beginner, learning how to grow dill from seed indoors will transform your cooking and add a touch of green to your home.
Get ready to discover the secrets that will make your indoor gardening journey a success and empower you to nurture your very own dill oasis. Keep reading to unlock the tips and tricks you need to start your indoor dill-growing adventure today!

Credit: www.epicgardening.com
Benefits Of Growing Dill Indoors
Dill thrives indoors, offering fresh flavors year-round. Easy to grow from seed, it requires minimal space and care. Enjoy aromatic leaves for cooking and garnishing right from your windowsill.
Growing dill indoors offers a multitude of benefits that go beyond simply having fresh herbs at your fingertips. Imagine the satisfaction of snipping a sprig of dill from your own indoor garden to add flavor to your cooking. Not only do you ensure the freshest flavor, but you also enjoy the convenience and control of growing herbs in your own space. Let’s dive into why cultivating dill indoors is a rewarding venture.Freshness At Your Fingertips
Having dill indoors means you can harvest it whenever you need. You don’t have to worry about the wilting herbs from the store. Your indoor dill is always vibrant and ready to enhance your dishes. Picture preparing a meal and being able to pick fresh dill just steps away.Control Over Growing Conditions
Growing dill indoors gives you control over temperature, light, and humidity. This means you can ensure optimal growing conditions regardless of outdoor weather. You can adjust conditions to suit dill’s needs, leading to healthier plants and better yield. Isn’t it empowering to have control over your own mini ecosystem?Year-round Growth
Outdoor gardening often limits you to seasonal growth. Indoor gardening breaks these barriers. You can grow dill all year round, never missing out on its fresh taste. This continuous availability means you always have the perfect garnish for your dishes.Space Efficiency
Indoor gardening allows you to utilize small spaces effectively. You don’t need a sprawling garden to enjoy fresh herbs. A sunny windowsill or a small planter can become your dill haven. How could you transform a corner of your home into a lush herb garden?Minimal Maintenance
Dill is relatively low maintenance when grown indoors. It doesn’t demand extensive care or attention. With regular watering and adequate light, dill thrives without fuss. This makes it perfect for beginners or those with a busy schedule. Are you ready to start your easy herb-growing journey?Enhanced Culinary Experience
With fresh dill at hand, you can experiment with flavors and enhance your culinary skills. Adding fresh herbs can elevate your dishes, making them more aromatic and flavorful. Imagine the delight of discovering new recipes with your homegrown dill. Growing dill indoors is not just about practicality; it’s about enriching your lifestyle. With each sprig you harvest, you’re cultivating a deeper connection with your food and the environment. So, what’s stopping you from transforming a part of your home into a thriving herb garden?Choosing The Right Seeds
Selecting the perfect seeds is vital for growing dill indoors. Opt for high-quality seeds from a reliable source. Fresh seeds ensure healthy growth and flavorful harvests.
Growing dill indoors from seed is both rewarding and simple. It all starts with selecting the right seeds. The quality of your dill plant depends on this crucial step. Let’s dive into the essentials of choosing the best dill seeds for indoor planting.Understanding Dill Seed Varieties
Different dill varieties offer unique flavors and uses. Common types include Bouquet, Fernleaf, and Mammoth. Bouquet dill is great for pickling. Fernleaf is ideal for small spaces. Mammoth grows tall and is good for fresh use. Choose seeds that match your space and needs.Look For Heirloom Or Organic Seeds
Heirloom seeds often offer superior taste. They are passed down through generations. Organic seeds are grown without synthetic chemicals. This ensures a healthier plant. Check seed packets for these labels.Check Seed Freshness
Fresh seeds have better germination rates. Look for a packed-on or expiration date. Fresher seeds sprout more successfully. Avoid old or expired seeds.Consider Seed Source
Purchase seeds from reputable sellers. Local garden stores often have reliable seeds. Online seed companies provide detailed information. Research and read reviews before buying.Read Seed Packet Instructions
Seed packets contain vital information. Look for planting depth and spacing guidelines. Follow these instructions for best results. They ensure proper growth and development.Preparing Your Indoor Space
Growing dill indoors starts with preparing your space. A well-prepared area ensures healthy growth. This step sets the foundation for your indoor garden. Begin by selecting the right containers and choosing the ideal location. Each plays a crucial role in the success of your dill plants.
Selecting Containers
Pick containers with good drainage holes. Dill roots dislike soggy soil. Choose a pot at least 12 inches deep. This depth allows roots to grow freely. Plastic or clay pots work well. Ensure the material suits your indoor climate. Lightweight containers are easier to move. This helps when adjusting light exposure.
Choosing The Ideal Location
Find a spot with plenty of sunlight. Dill needs at least 6 hours daily. South-facing windows are perfect. If natural light is scarce, use a grow light. Place the light close to the plants. This mimics natural sunlight. Ensure the location is draft-free. Dill prefers stable temperatures. Avoid placing pots near heating vents.
Planting Dill Seeds
Growing dill indoors begins with planting seeds in well-draining soil. Ensure good sunlight and regular watering for healthy growth. Thin seedlings to avoid overcrowding and promote strong plants.
Planting dill seeds indoors is a rewarding endeavor that offers a head start on the growing season. The aromatic herb adds flair to your kitchen and is easy to cultivate with the right techniques. Imagine your windowsill adorned with delicate green fronds, ready to enhance your culinary creations. Let’s dive into the essential steps for planting dill seeds indoors.Seed Sowing Techniques
Begin your dill journey by sowing seeds indoors. It’s a simple process that requires attention to detail. Use small pots or seed trays for sowing; they give you control over the growing environment. Scatter the seeds lightly over the soil surface. Keep them evenly spaced to prevent overcrowding, ensuring each seed has enough room to thrive. Cover the seeds with a thin layer of soil or vermiculite. This helps retain moisture and encourages germination. You might be surprised at how quickly they sprout, eager to grow.Optimal Soil Mix
Choosing the right soil mix is crucial for healthy dill plants. Opt for a light, well-draining soil to prevent waterlogging. It’s like giving your dill the perfect home to grow. Mix equal parts of potting soil, sand, and perlite for an ideal blend. This combination ensures good drainage and nutrient retention. You want your dill to flourish, not struggle. Consider adding a pinch of organic compost to enrich the mix. This provides essential nutrients, making your dill robust and flavorful. Have you ever noticed how a little care goes a long way? Your dill will thank you with vibrant growth and aromatic leaves.Watering And Feeding
Start by watering dill seeds lightly to keep the soil moist. Use a balanced liquid fertilizer every two weeks for healthy growth.
Watering and feeding are crucial for growing dill indoors. Proper care ensures healthy plants with vibrant foliage. Balanced hydration and nutrition promote optimal growth. Let’s explore how to keep your dill thriving.Watering Schedule
Dill needs consistent moisture. Water it every few days. Check the soil moisture regularly. Use your finger to test the top inch. If dry, it’s time to water. Avoid waterlogging; it harms roots. Ensure drainage holes in pots. Prevent excess water accumulation. Early morning is ideal for watering. This reduces evaporation.Fertilizer Options
Dill benefits from light feeding. Choose a balanced liquid fertilizer. Apply every two weeks. Organic options are gentle on plants. Fish emulsion or compost tea work well. Follow package instructions. Too much fertilizer can burn dill. Dilute fertilizer with water. This ensures safe application.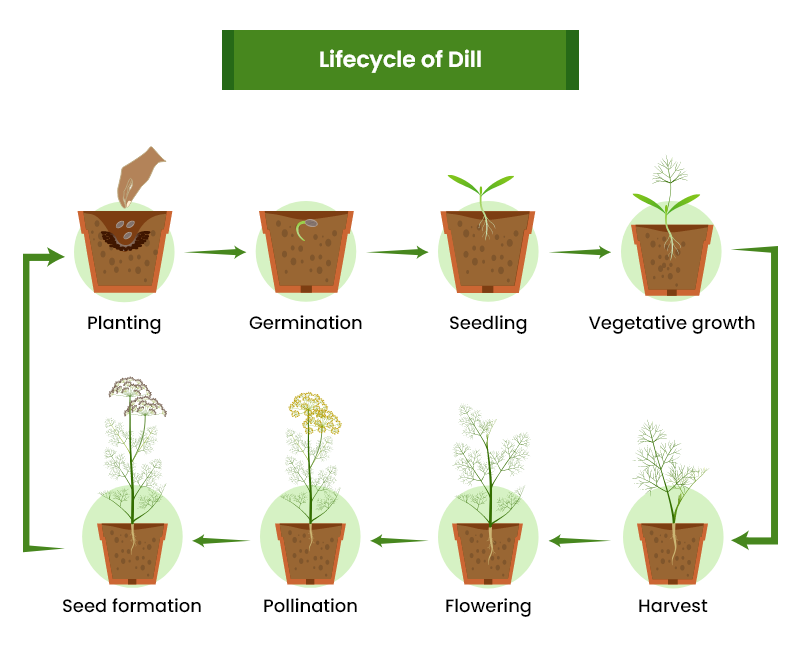
Credit: homegrownoutlet.com
Managing Light And Temperature
Dill thrives indoors with proper light and temperature. Position the seeds near a sunny window for 6-8 hours of light daily. Maintain room temperature around 60-70°F for optimal growth.
Managing light and temperature is crucial for indoor dill growth. Proper light and temperature ensure healthy and lush plants. With the right environment, dill thrives indoors. Let’s explore how to manage these elements effectively.Light Requirements
Dill needs a lot of light to grow well. Place your dill near a sunny window. Ideally, it should get 6-8 hours of sunlight daily. If natural light is limited, use grow lights. Position the lights 6-12 inches above the plants. Keep them on for about 14-16 hours each day. Adjust the height as the dill grows taller.Temperature Control
Dill prefers cool temperatures for optimal growth. The ideal range is between 60-70°F (15-21°C). Avoid placing dill near heat sources like radiators. These can dry out the plant quickly. Also, keep dill away from cold drafts. Sudden temperature changes can stress the plant. Maintain a stable indoor climate for best results.Pest And Disease Control
Growing dill indoors can be rewarding but also challenging. Pests and diseases can impact your dill plants. Knowing how to manage these issues is essential for healthy growth.
Common Pests
Aphids often target dill, sucking sap from the leaves. Look for tiny insects on the undersides of leaves. Spider mites can also be a problem. They create small webs and cause leaves to yellow.
Fungal gnats lay eggs in damp soil. Their larvae feed on plant roots. This can cause stunted growth in dill plants.
Preventive Measures
Maintain good air circulation around your dill plants. This helps prevent mold and fungal issues. Use a fan to circulate air if needed.
Keep the growing area clean and free of debris. Remove any fallen leaves or plant material promptly. Avoid overwatering to reduce fungal growth risk.
Introduce beneficial insects like ladybugs. They help control aphid populations naturally. Regularly inspect your plants for signs of pests. Catching problems early prevents them from spreading.
Harvesting Dill
Growing dill indoors starts with choosing quality seeds. Plant seeds in pots with well-drained soil. Ensure ample sunlight and regular watering for healthy growth. Harvest dill leaves once they reach 6-8 inches, snipping carefully to encourage more growth. Enjoy fresh dill in your favorite dishes.
Harvesting dill is a rewarding experience for indoor gardeners. Dill’s unique flavor enhances various dishes, making it a valuable addition to your kitchen. Knowing when and how to harvest ensures you enjoy fresh herbs at their peak. Proper harvesting also promotes healthy plant growth. Let’s explore the best practices for harvesting dill indoors.When To Harvest
Harvest dill when leaves are vibrant and lush. Typically, this occurs 6 to 8 weeks after planting. Look for mature plants with full foliage. Harvesting before the plant flowers gives better flavor. You can cut dill leaves anytime during their peak growth. Check regularly for signs of bolting, when the plant starts to flower. This indicates it’s time to harvest.Harvesting Techniques
Use clean scissors or pruning shears for harvesting. Trim leaves close to the stem. Avoid cutting more than one-third of the plant. This helps maintain plant health. For best results, harvest in the morning. This preserves essential oils in the leaves. Store freshly cut dill in a glass of water. Alternatively, wrap it in a damp paper towel. Keep it in the refrigerator for extended freshness. Harvesting dill correctly ensures flavorful herbs for your dishes. Enjoy the delightful taste and aroma of fresh dill from your indoor garden.Using Fresh Dill In Cooking
Growing dill from seed indoors is simple and rewarding. Start with a pot filled with well-draining soil. Place seeds about 1/4 inch deep and keep the soil moist. Ensure ample sunlight for healthy growth. Fresh dill adds a unique flavor to dishes, enhancing your culinary experience.
Growing dill indoors is a rewarding experience that brings fresh flavors right to your kitchen. Once you’ve nurtured your dill from seed, the next exciting step is using it in your culinary creations. Fresh dill can transform ordinary dishes into extraordinary meals, making your cooking more vibrant and aromatic. Whether you’re a seasoned chef or a home cook, incorporating fresh dill into your recipes can elevate your cooking game.Popular Recipes
Fresh dill is a versatile herb that can enhance a wide range of dishes. Have you ever tried dill in scrambled eggs? It adds a subtle yet delightful flavor that pairs perfectly with morning coffee. Another favorite is dill-infused potato salad; the freshness of dill complements the creaminess of the salad beautifully. You could also sprinkle dill over roasted vegetables for an unexpected twist. Consider adding dill to your homemade dips and dressings. A dill-infused yogurt sauce pairs excellently with grilled meats, providing a burst of flavor without overpowering the dish. Fresh dill can also be a star ingredient in soups, particularly in chicken or fish broths. What’s your favorite dill recipe? Experiment and find out how this herb can become an essential part of your culinary repertoire.Storage Tips
To keep your freshly harvested dill vibrant, proper storage is key. Did you know dill can be kept fresh for up to two weeks in the refrigerator? Store it in a glass of water, just like a bouquet of flowers, and cover it loosely with a plastic bag. This method helps retain its flavor and freshness. For long-term storage, consider freezing dill. Chop the dill leaves finely and freeze them in ice cube trays with a bit of water. These dill cubes can be handy for soups and stews. Drying dill is another option, but it tends to lose some flavor. How do you store your dill? Try different methods and see which keeps your dill the freshest. Growing dill indoors not only brings the herb closer to you but also opens up endless possibilities in cooking. Whether you’re making traditional dishes or crafting new recipes, fresh dill can be the secret ingredient that makes your meals memorable.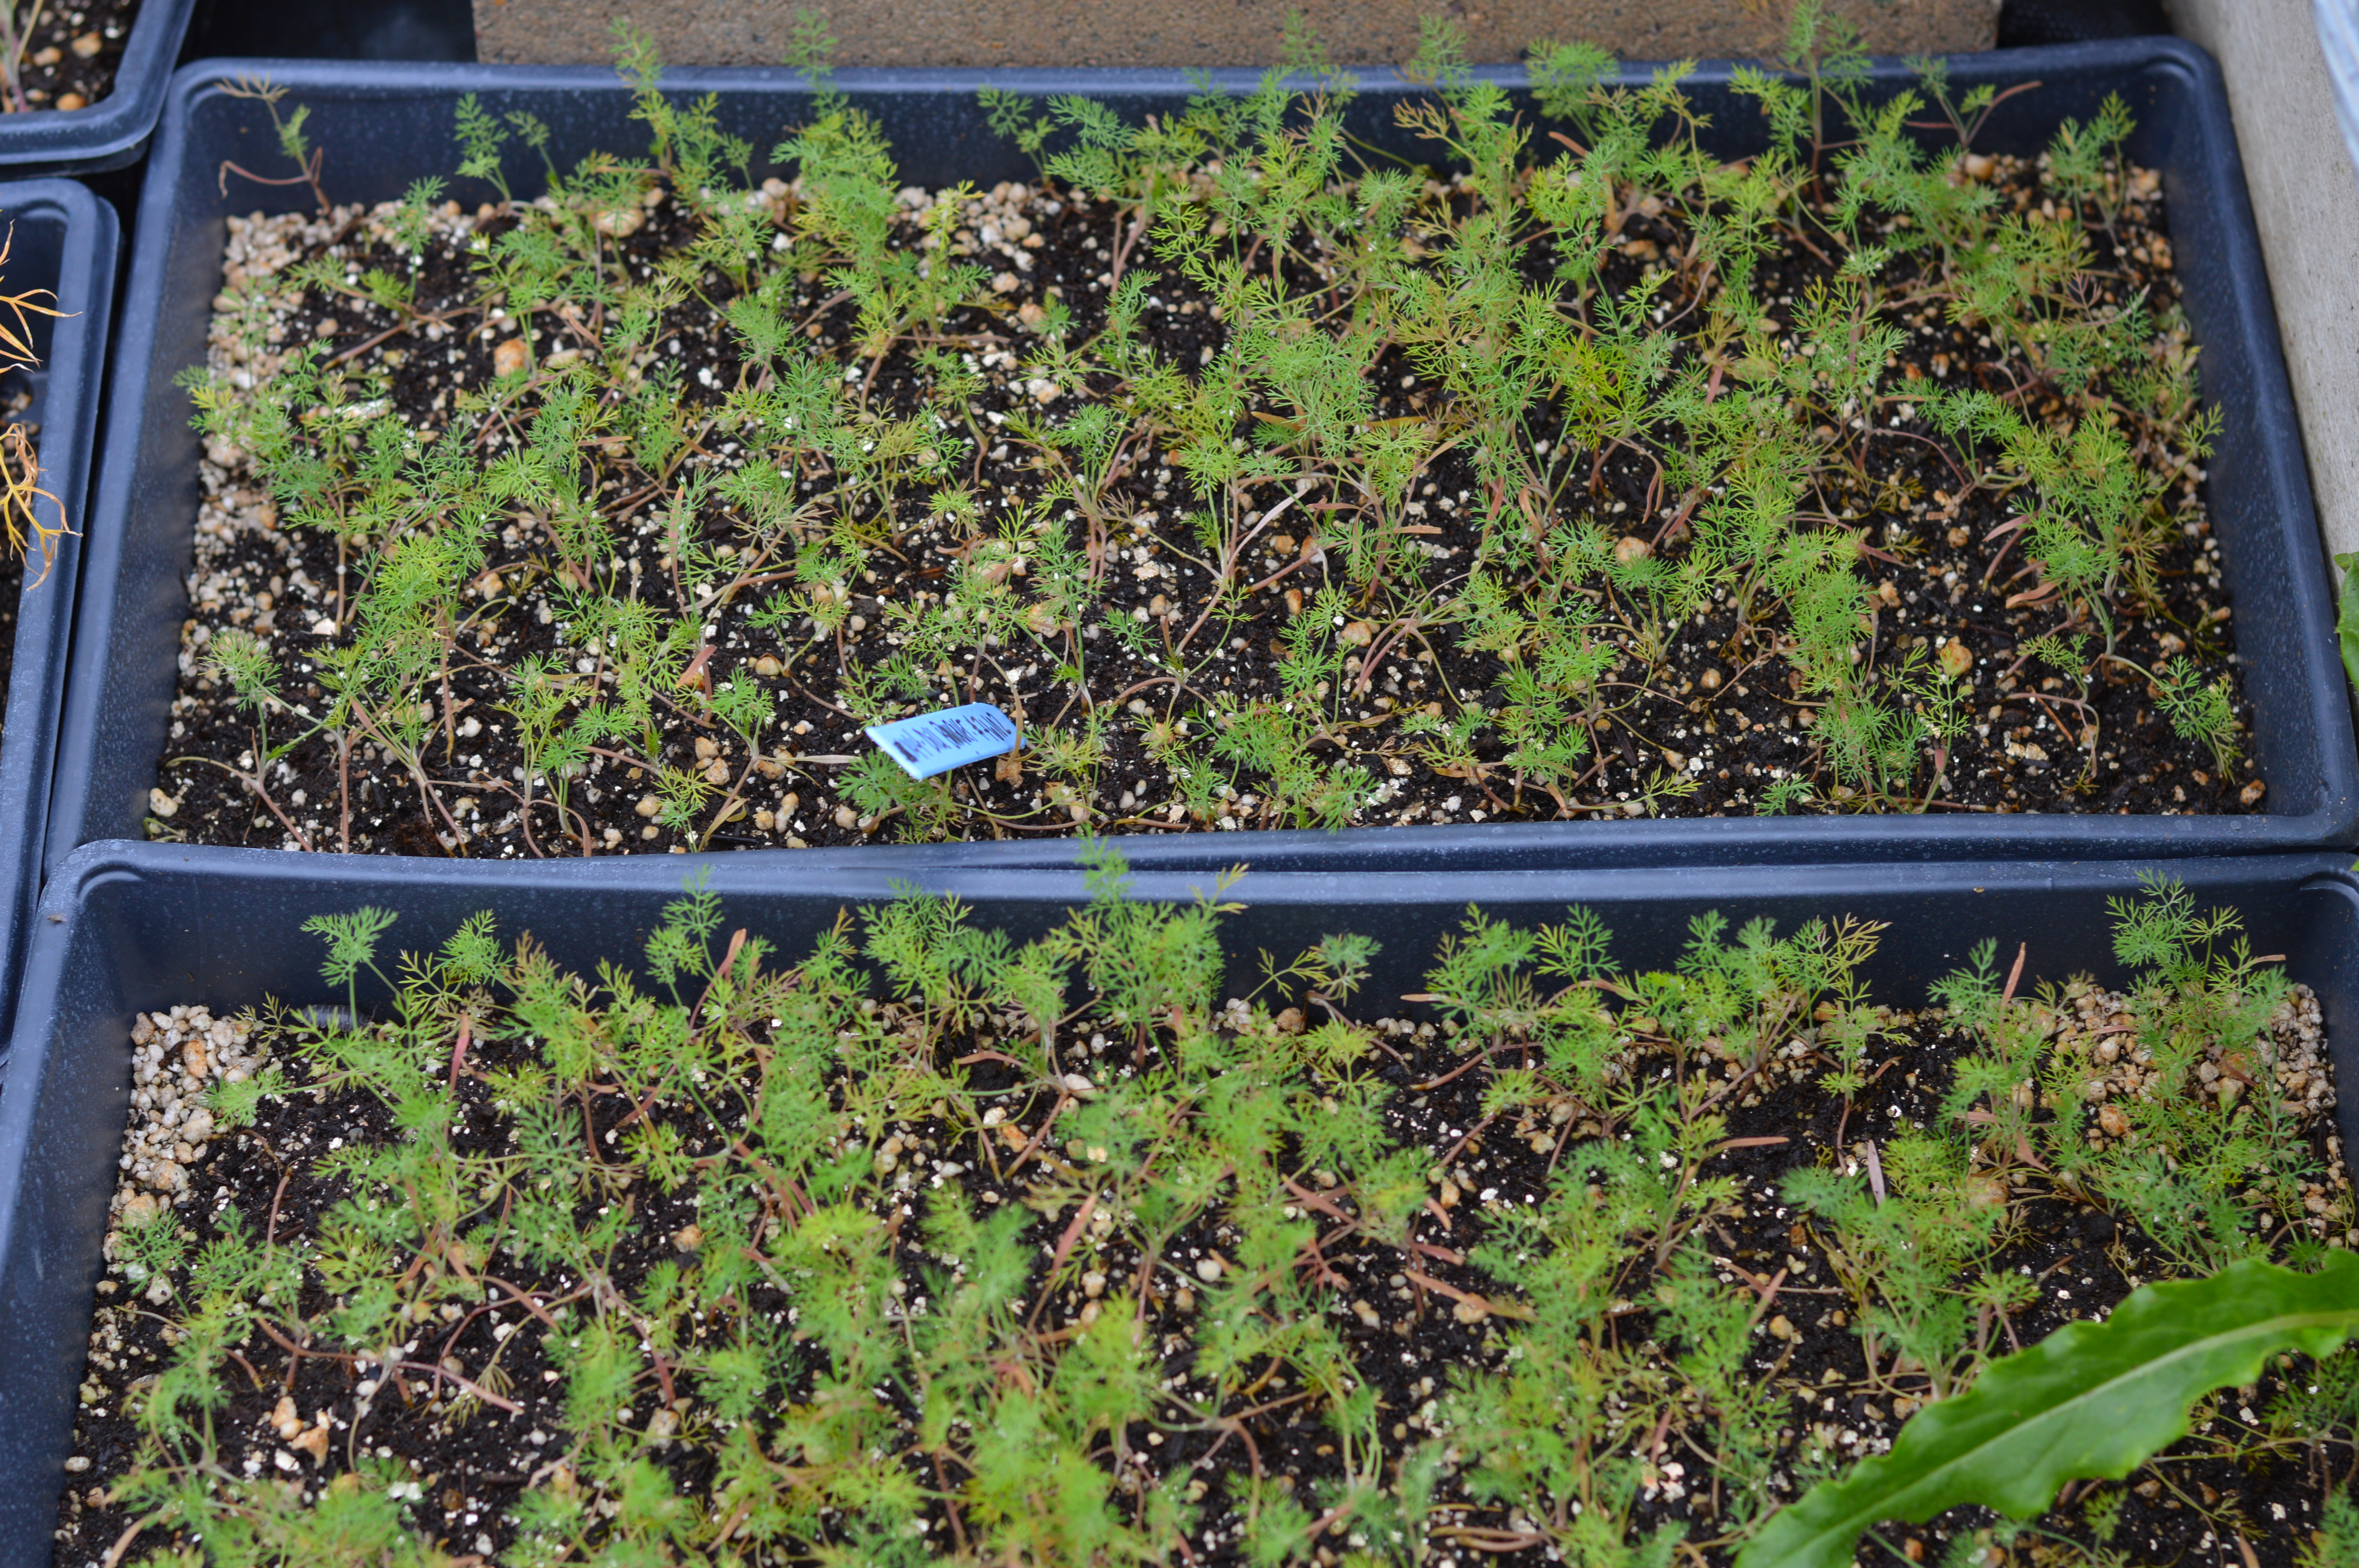
Credit: extension.umn.edu
Frequently Asked Questions
How Long Does Dill Take To Grow From Seed Indoors?
Dill typically takes 10 to 14 days to germinate indoors. Ensure the soil remains moist and warm. Seedlings grow best in well-drained soil with ample sunlight. Thin the seedlings once they reach about 2 inches tall. Expect full growth in approximately 4 to 8 weeks, depending on conditions.
Is Dill Hard To Grow Indoors?
Dill is relatively easy to grow indoors. Ensure it gets adequate sunlight and well-drained soil. Regular watering is essential, but avoid overwatering. Use a container with good drainage and maintain a temperature between 60-70°F. Harvest regularly to encourage growth. With care, dill thrives indoors.
What Is The Trick To Growing Dill?
Plant dill in well-drained soil with full sun exposure. Water regularly but avoid overwatering. Thin seedlings to ensure proper spacing. Harvest leaves before flowering for best flavor.
Do I Soak Dill Seeds Before Planting?
Soaking dill seeds before planting is not necessary. Plant them directly in well-drained soil for optimal growth. Water regularly to keep the soil moist. Dill thrives in sunny spots and can be sown indoors or outdoors. Ensure proper spacing between seeds to encourage healthy growth.
Conclusion
Growing dill indoors is simple and rewarding. Start with quality seeds and soil. Ensure proper light and moisture. Watch for growth and enjoy fresh dill. Use it in recipes or as a garnish. Indoor gardening adds life to your space.
It also offers fresh herbs at your fingertips. Perfect for flavoring dishes at home. Remember, patience brings the best results. Soon, you’ll have dill ready to harvest. Share your success with friends and family. They’ll be impressed with your green thumb! Keep nurturing your plants.
Happy gardening!
